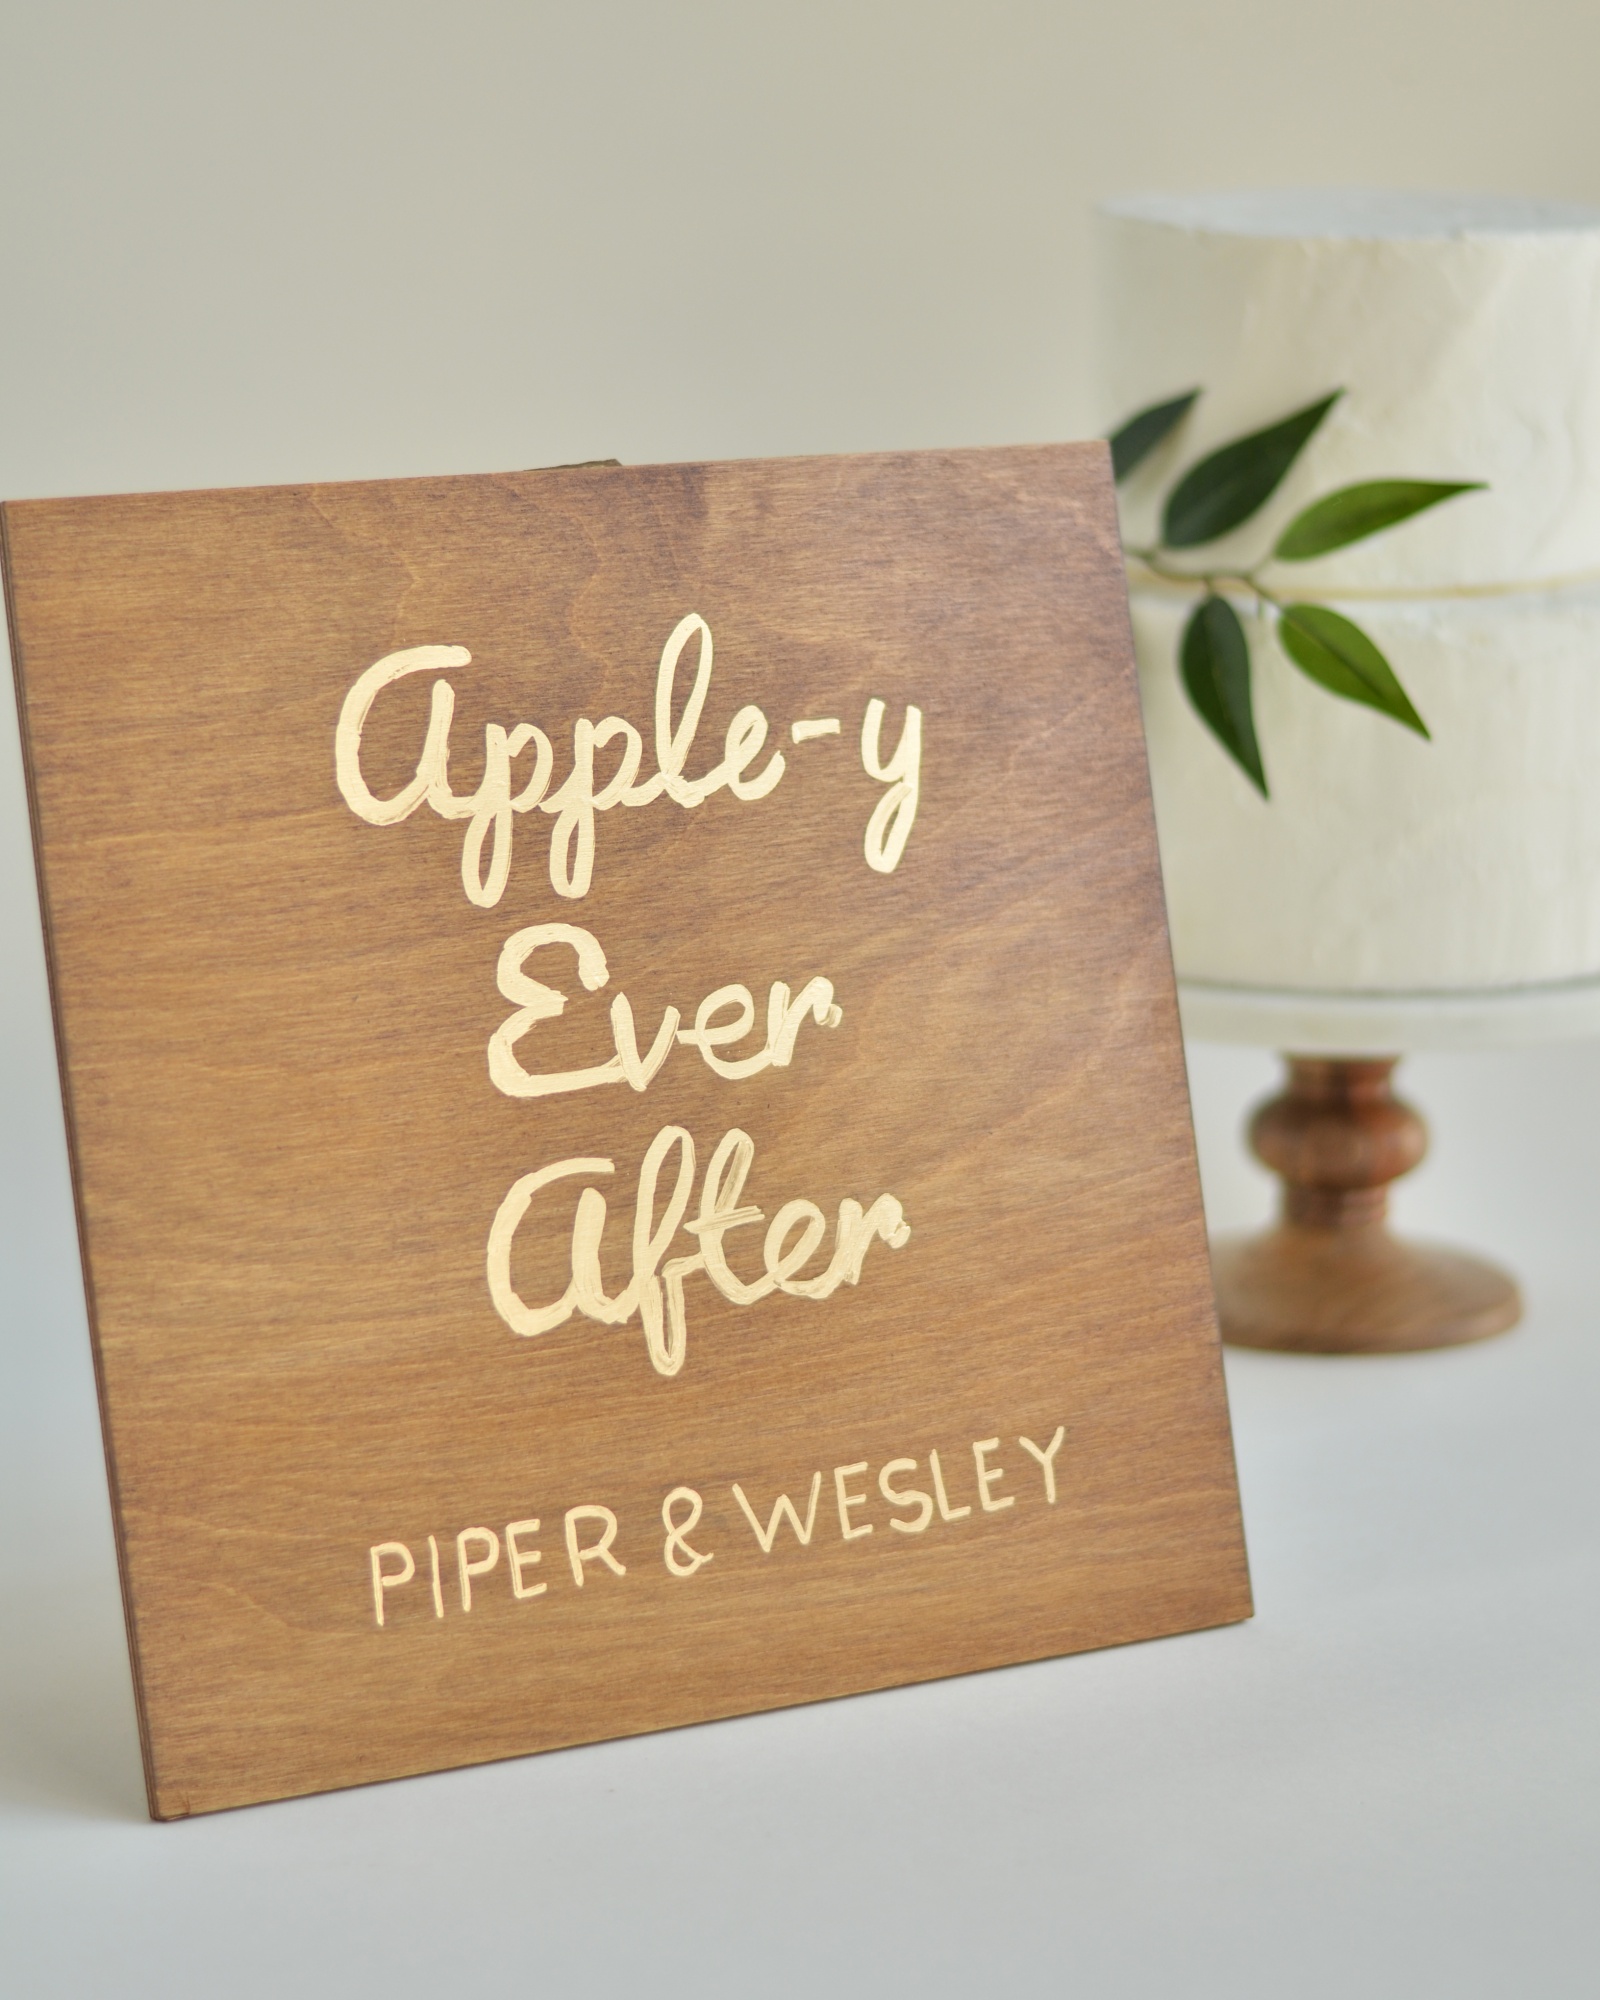
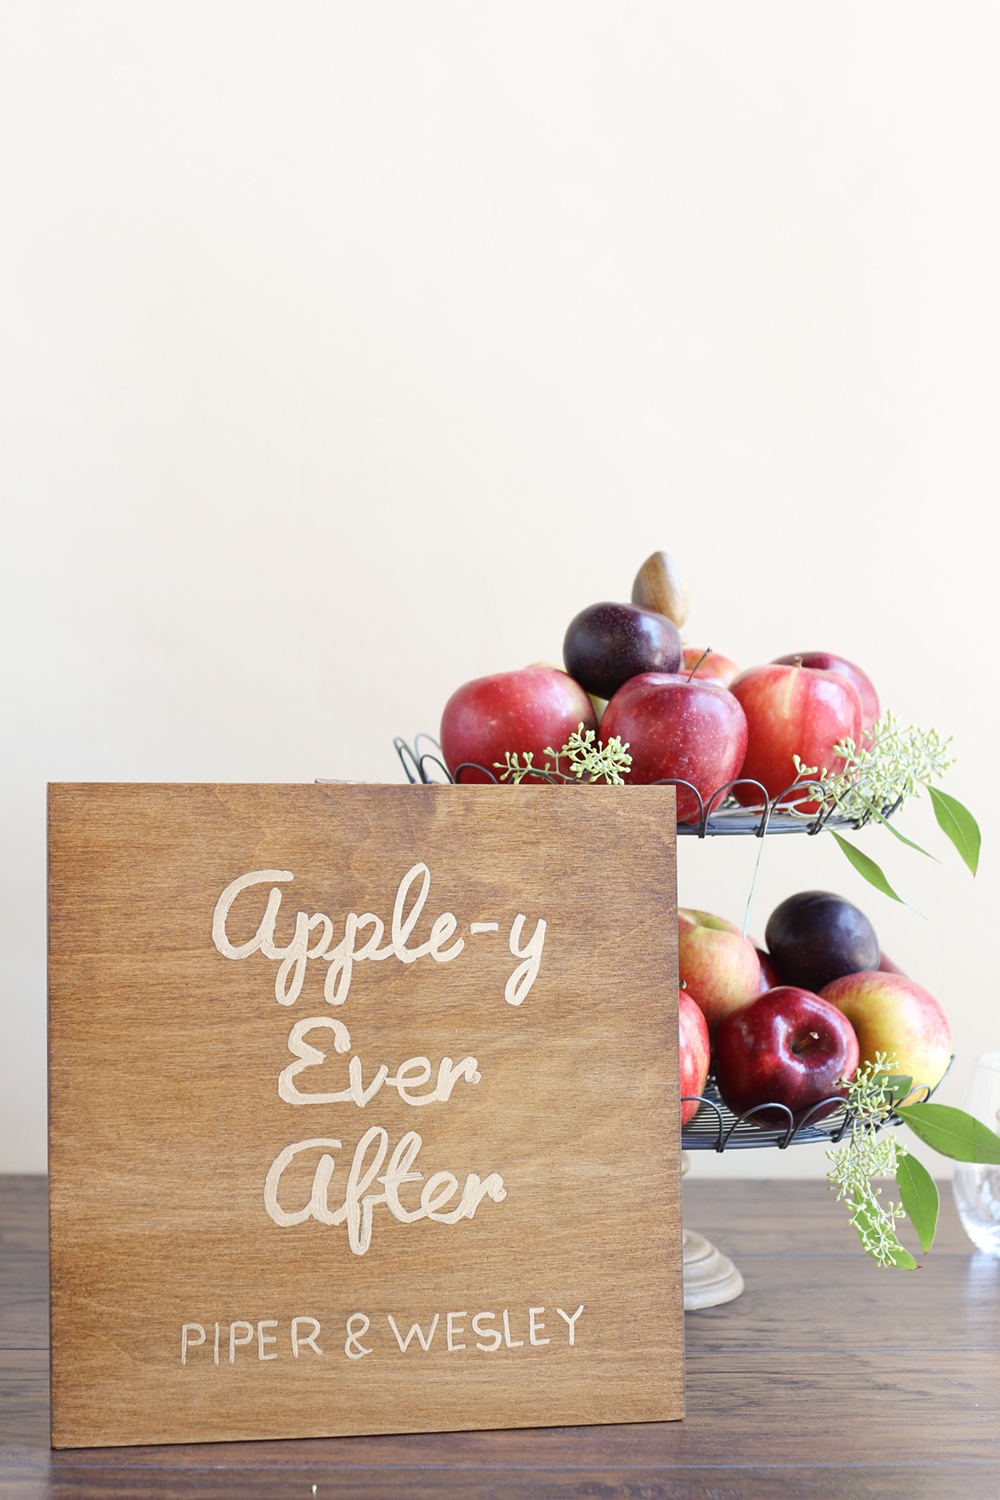
We are so excited for all the upcoming fall weddings, and today we’re here to show you a pretty and simple DIY to include on your big day. Tying into our Falling in Love wedding collection — which is inspired by the rich colors of fall, natural wood, and apples — we created our very own “Apple-y Ever After” DIY wood sign. Take a look at the tutorial below.
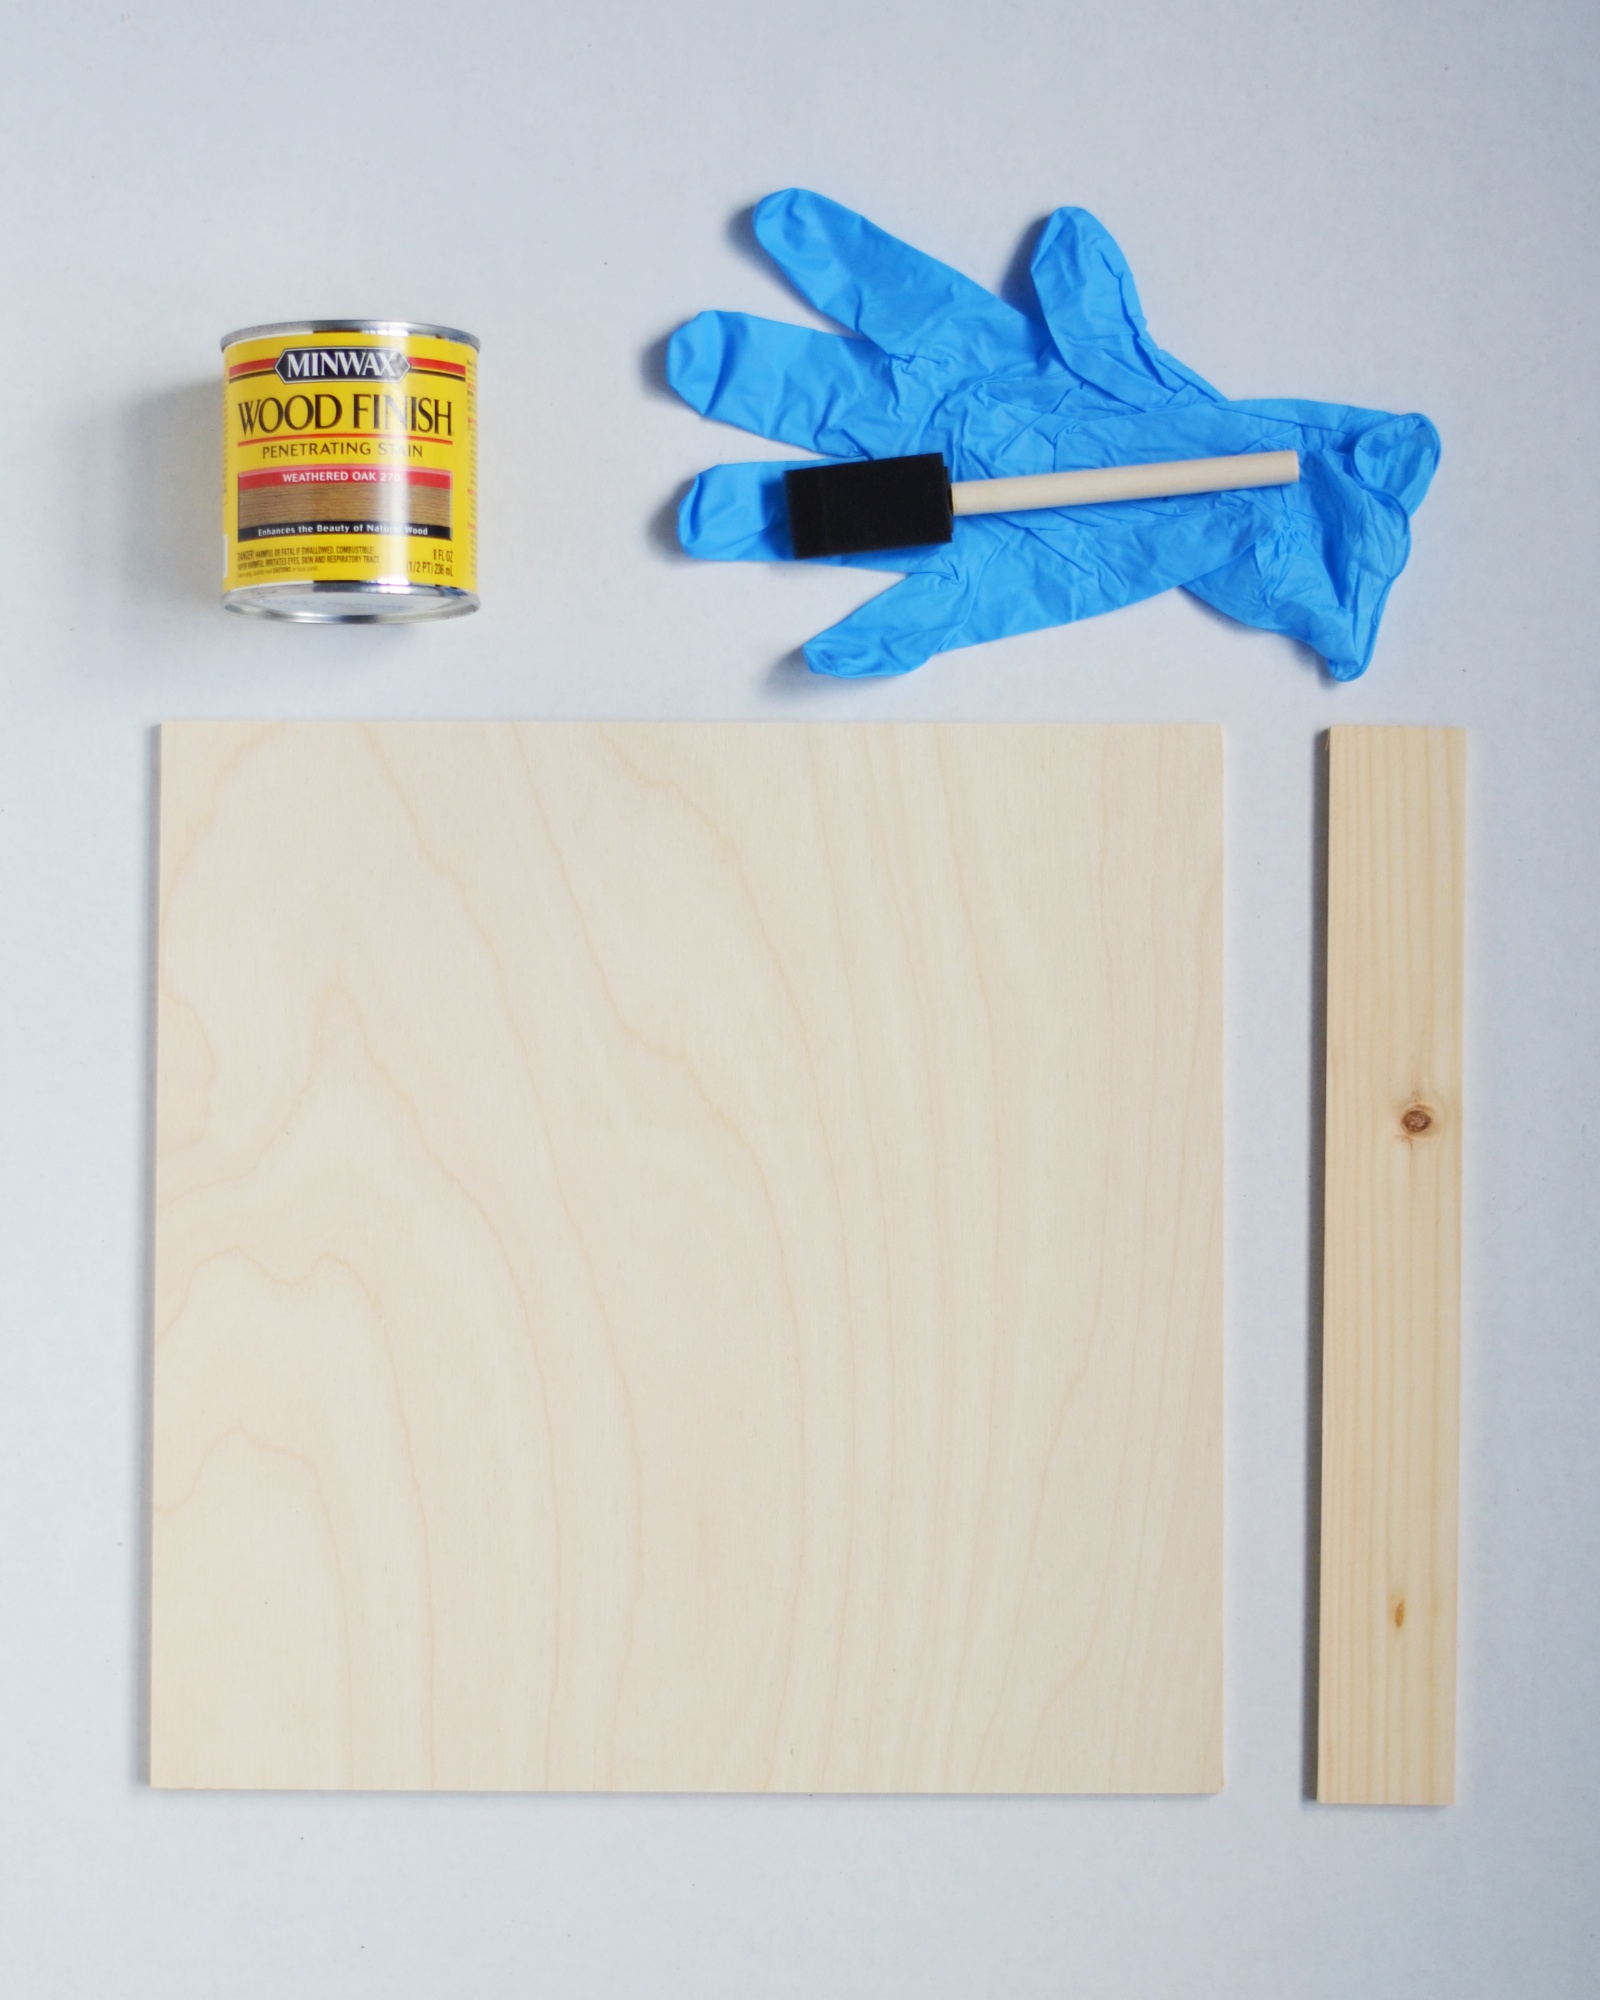
Here’s what you’ll need:
- Craft wood board in your desired size
- Thin craft wood for stand/leg
- Wood stain
- Foam brush
- Gloves
- Hinge with pointed screws (we took our hinge and screws from a $1 treasure chest from the craft store)
- Screwdriver
- Gold leafing pen
- Template of your desired phrase
- Craft knife
- Pencil
Instructions:
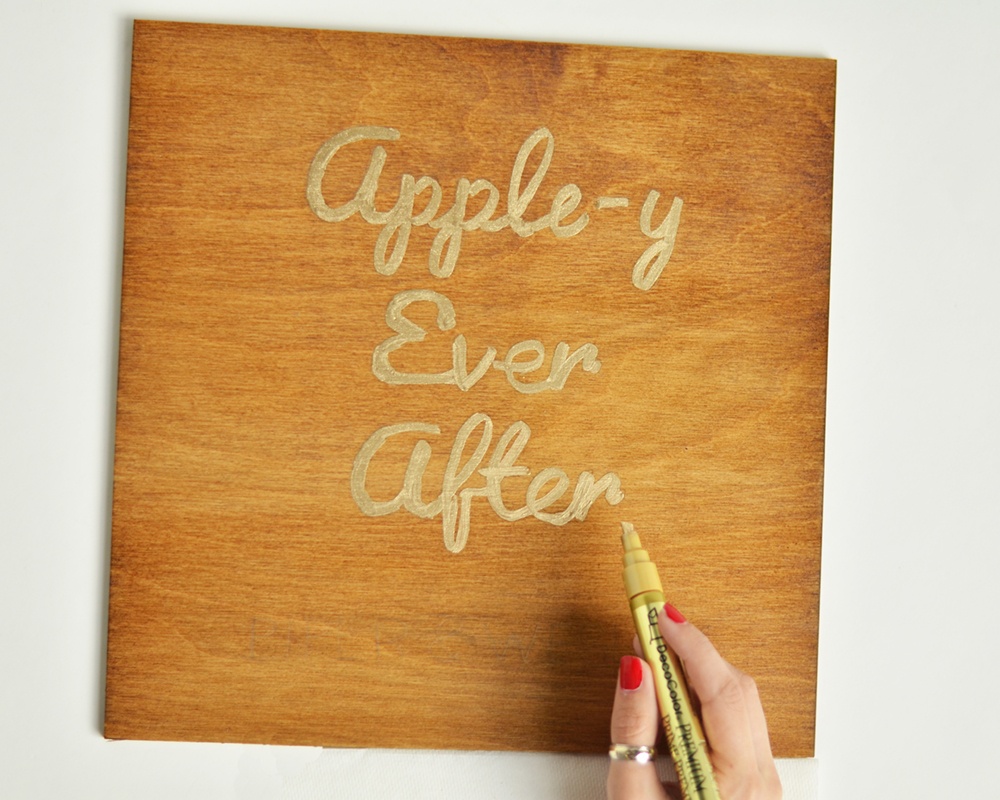
Start by creating a template with the words you’d like on your sign. Print out the template and then cut out the letters using a craft knife. Next, use a pencil to trace the words on to the wood board. Make your lines as dark as you can so that you’ll be able to see it through the wood stain.
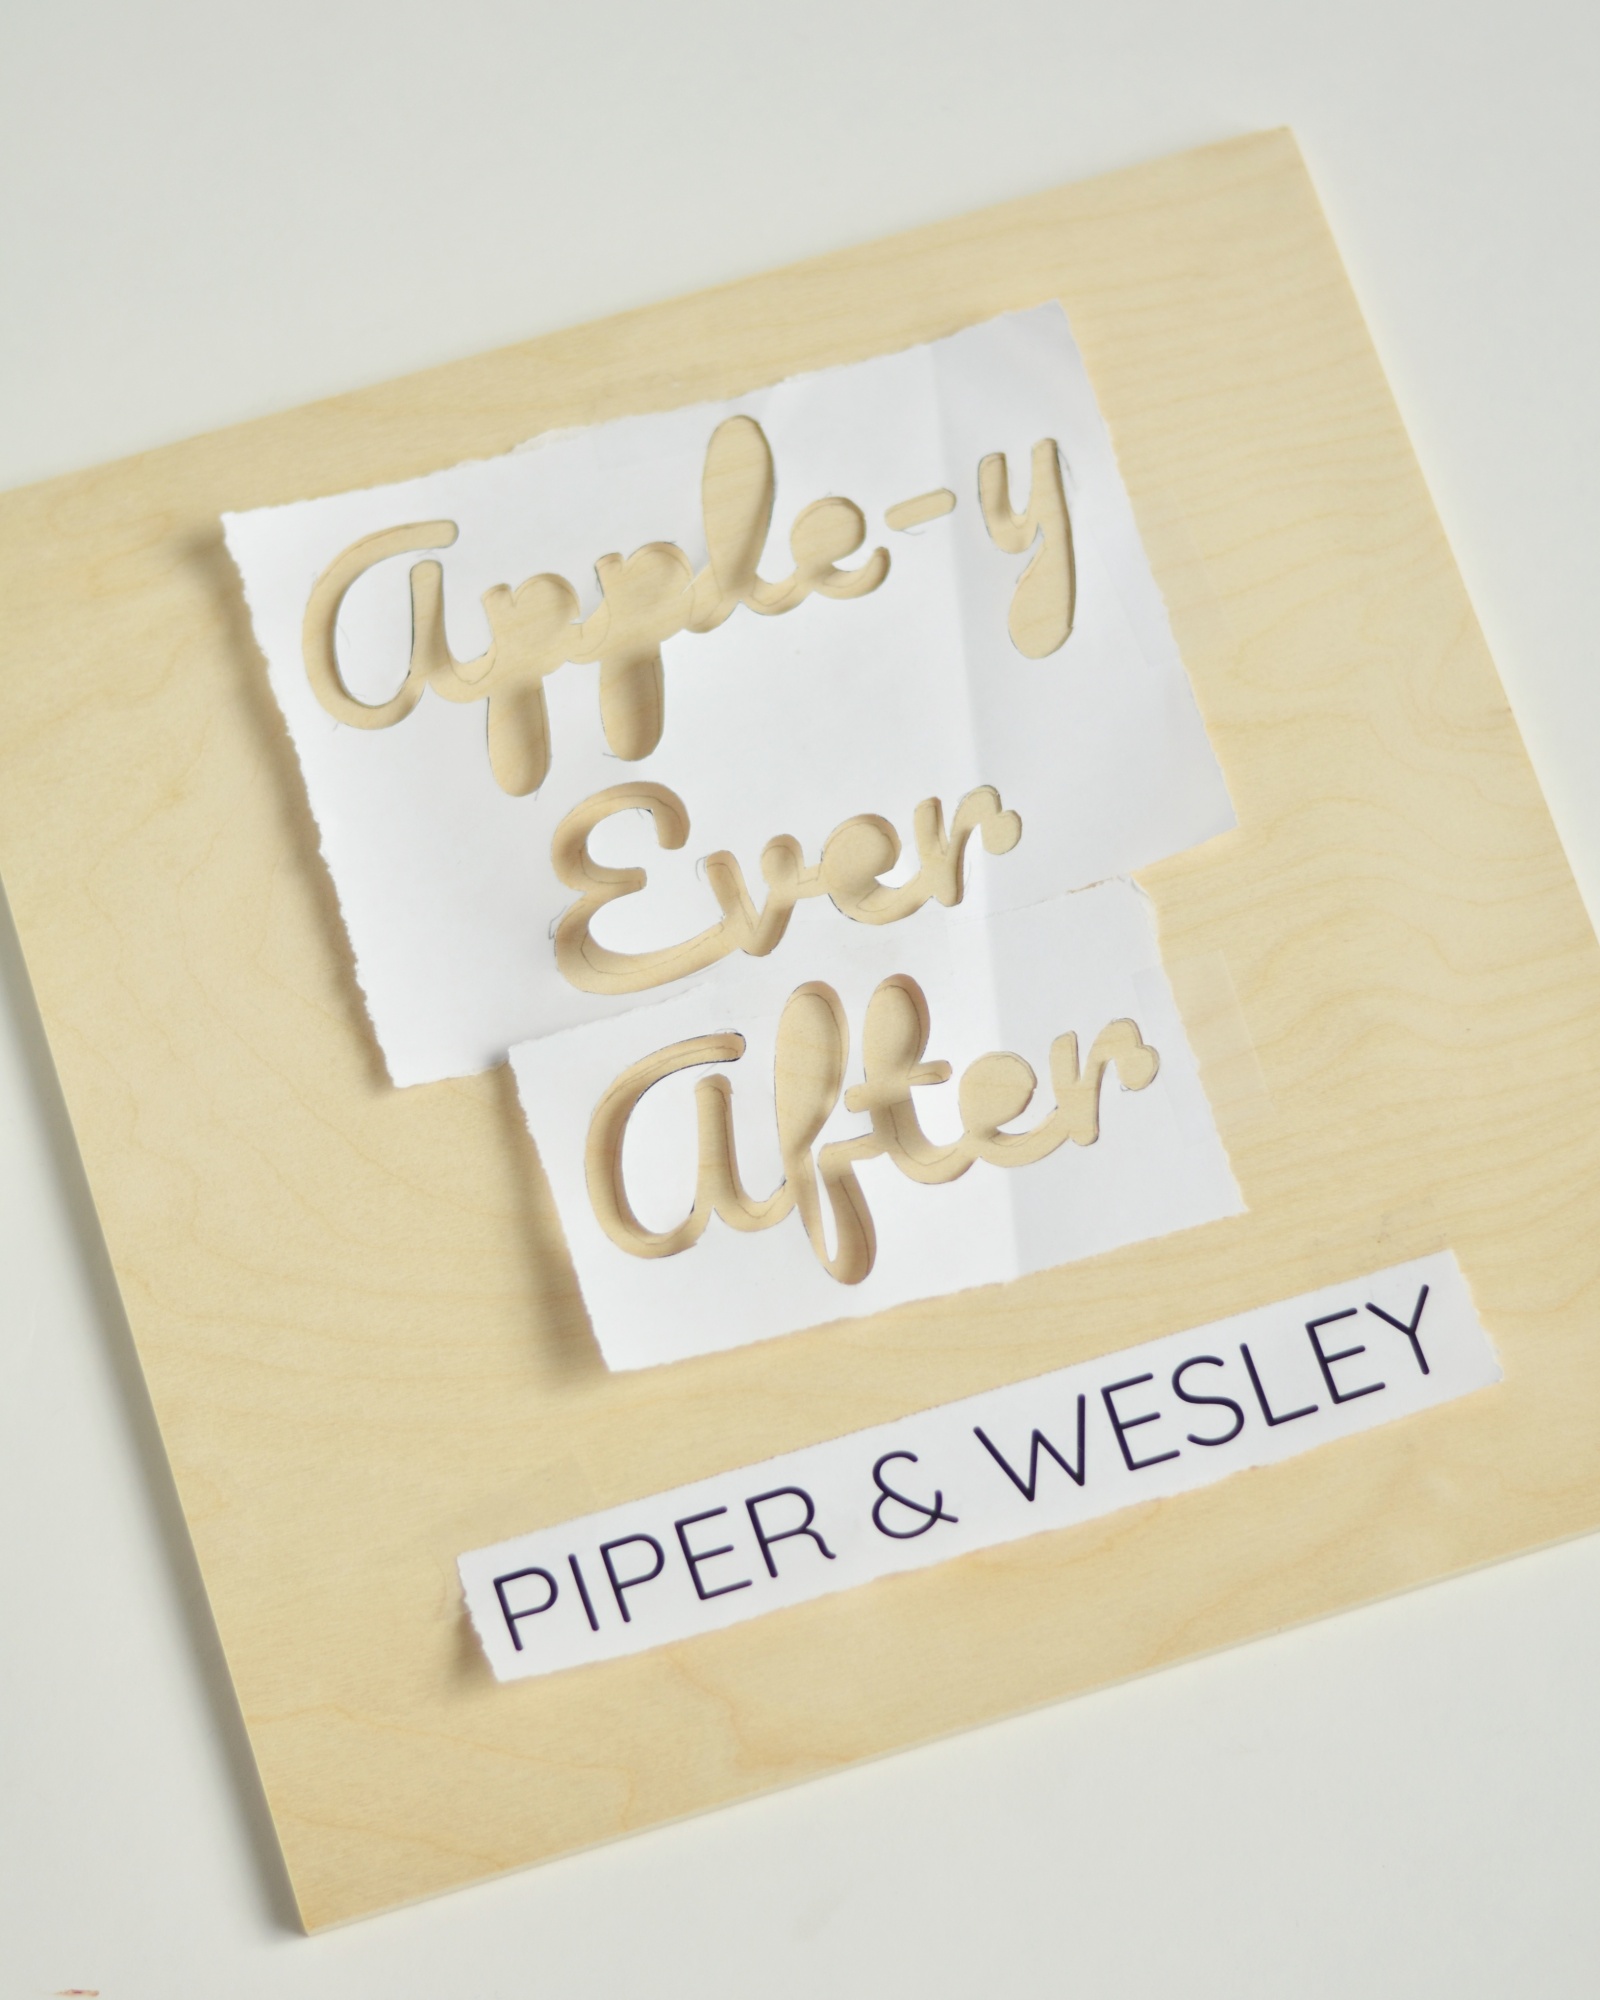
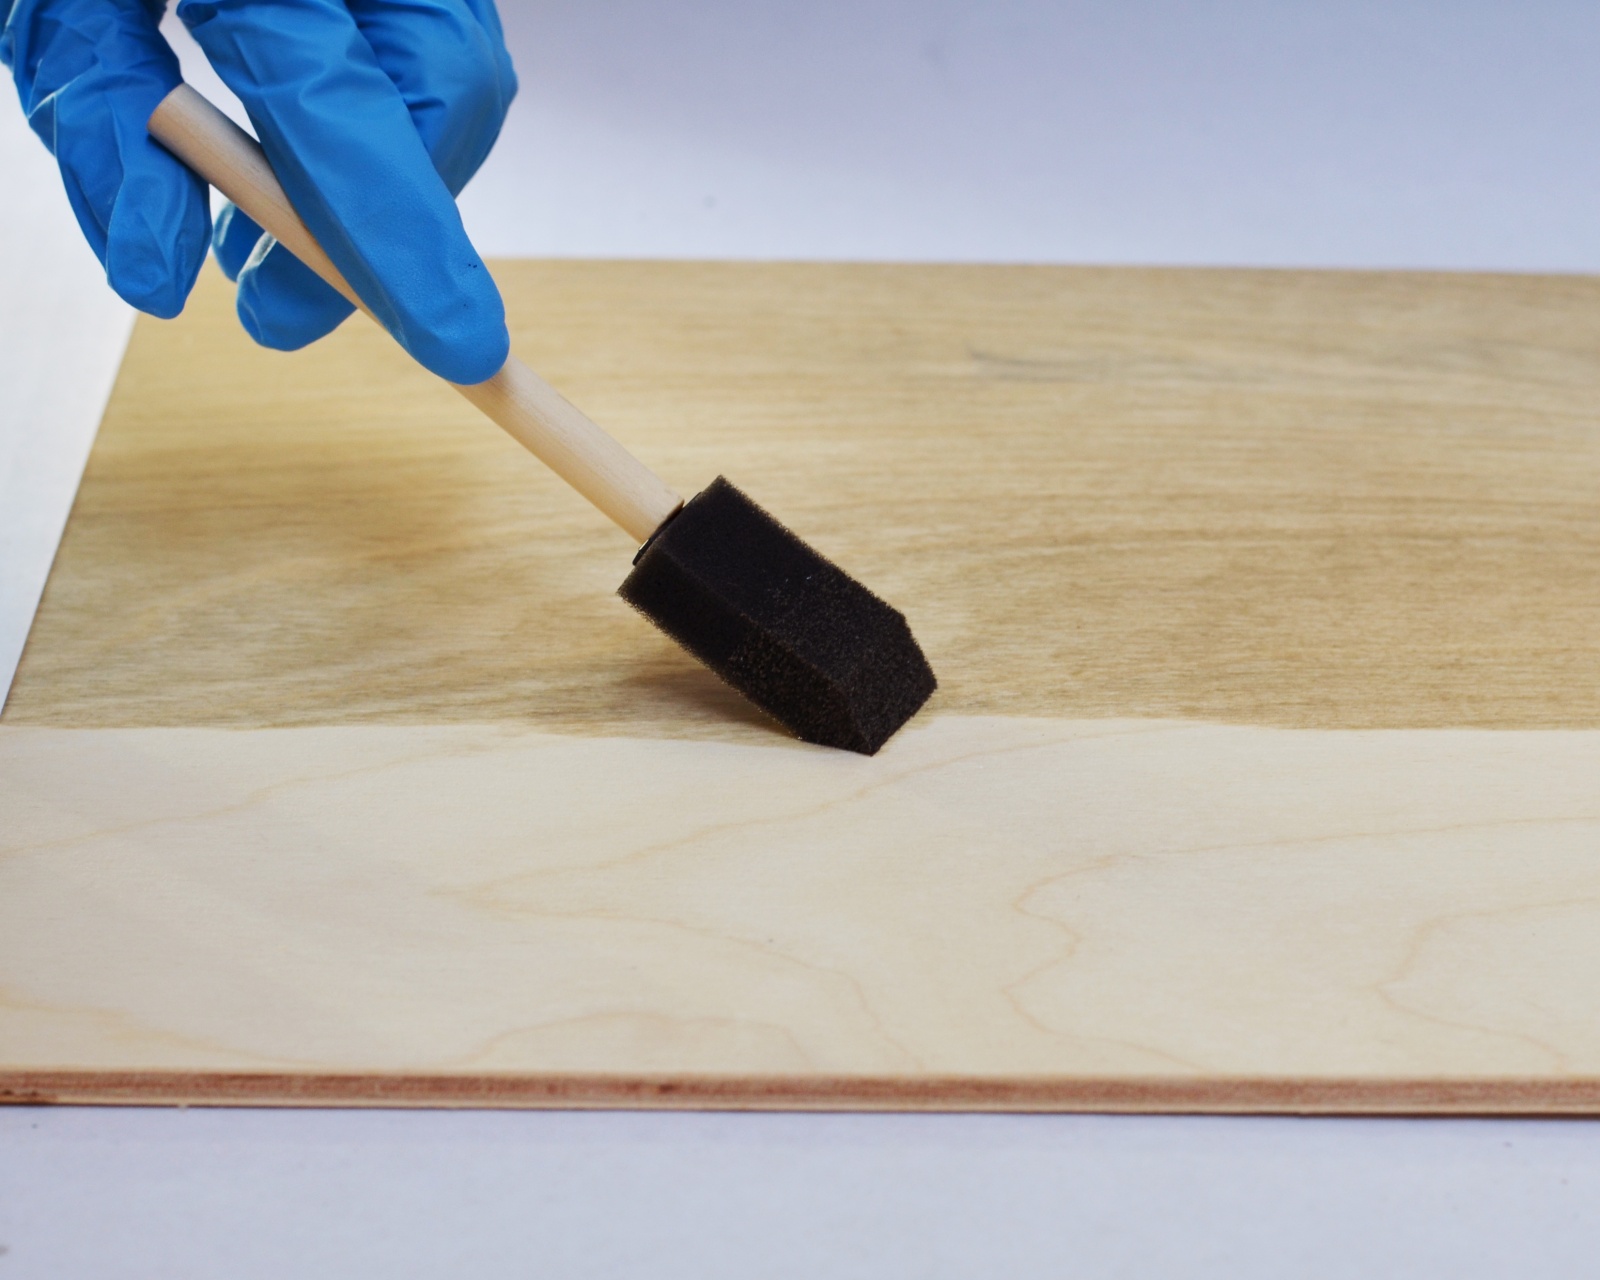
Stain the board and leg in your desired color and allow to dry. Then, trace the pencil outlined words with a gold leafing pen and allow to dry. (If you can’t see your pencil marks, just put the stencil back on and retrace.)
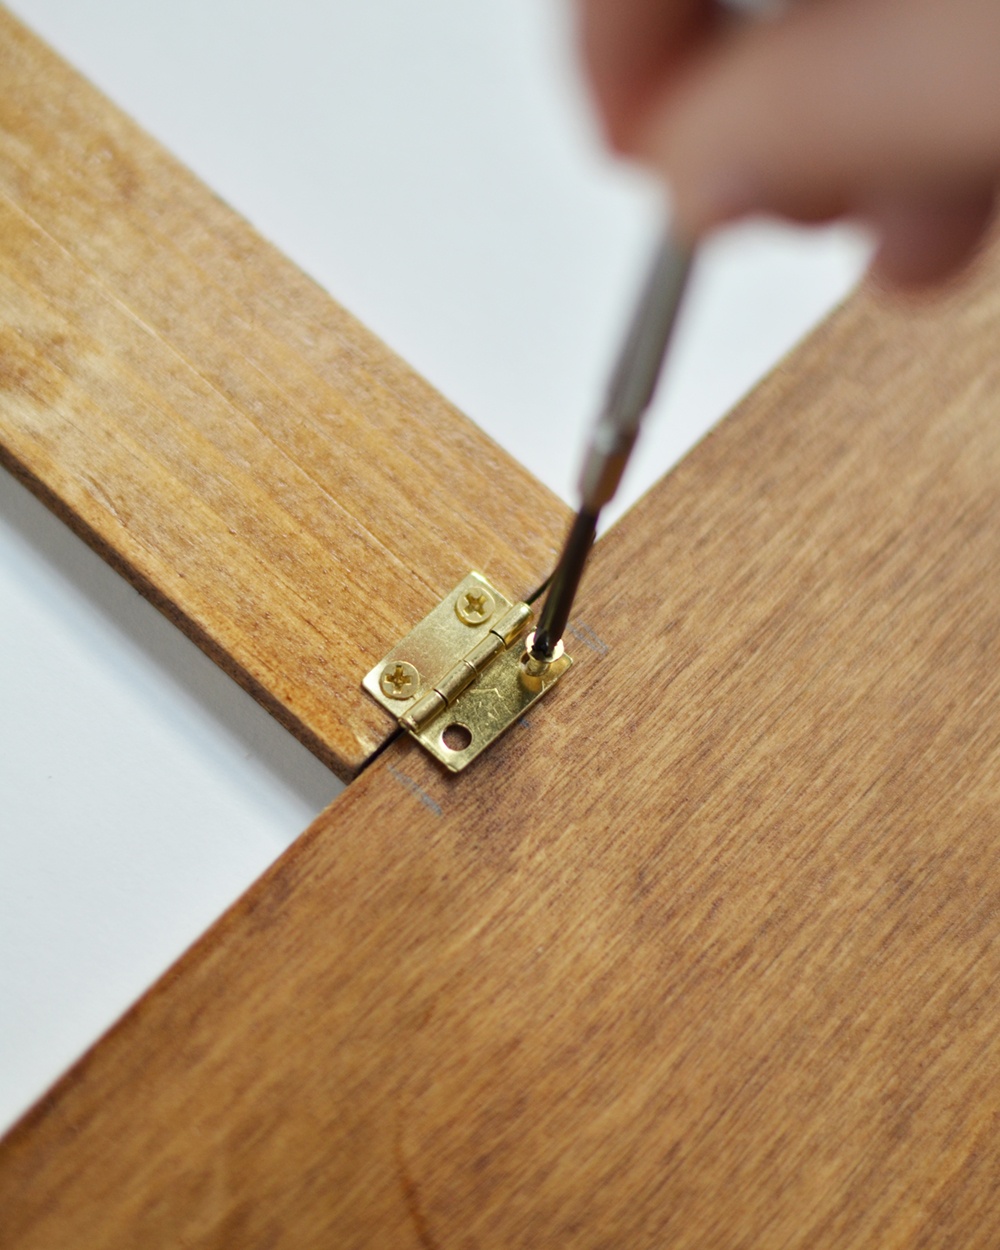
Using a screwdriver, attach the hinge to both the wood sign and the leg. You’ll want to attach the hinge to the back of the wood sign in the top center as well as the center on a short side of the leg. If your sign slides, you may want to add glue dots to the bottom of the sign and the leg to help it stay in place.
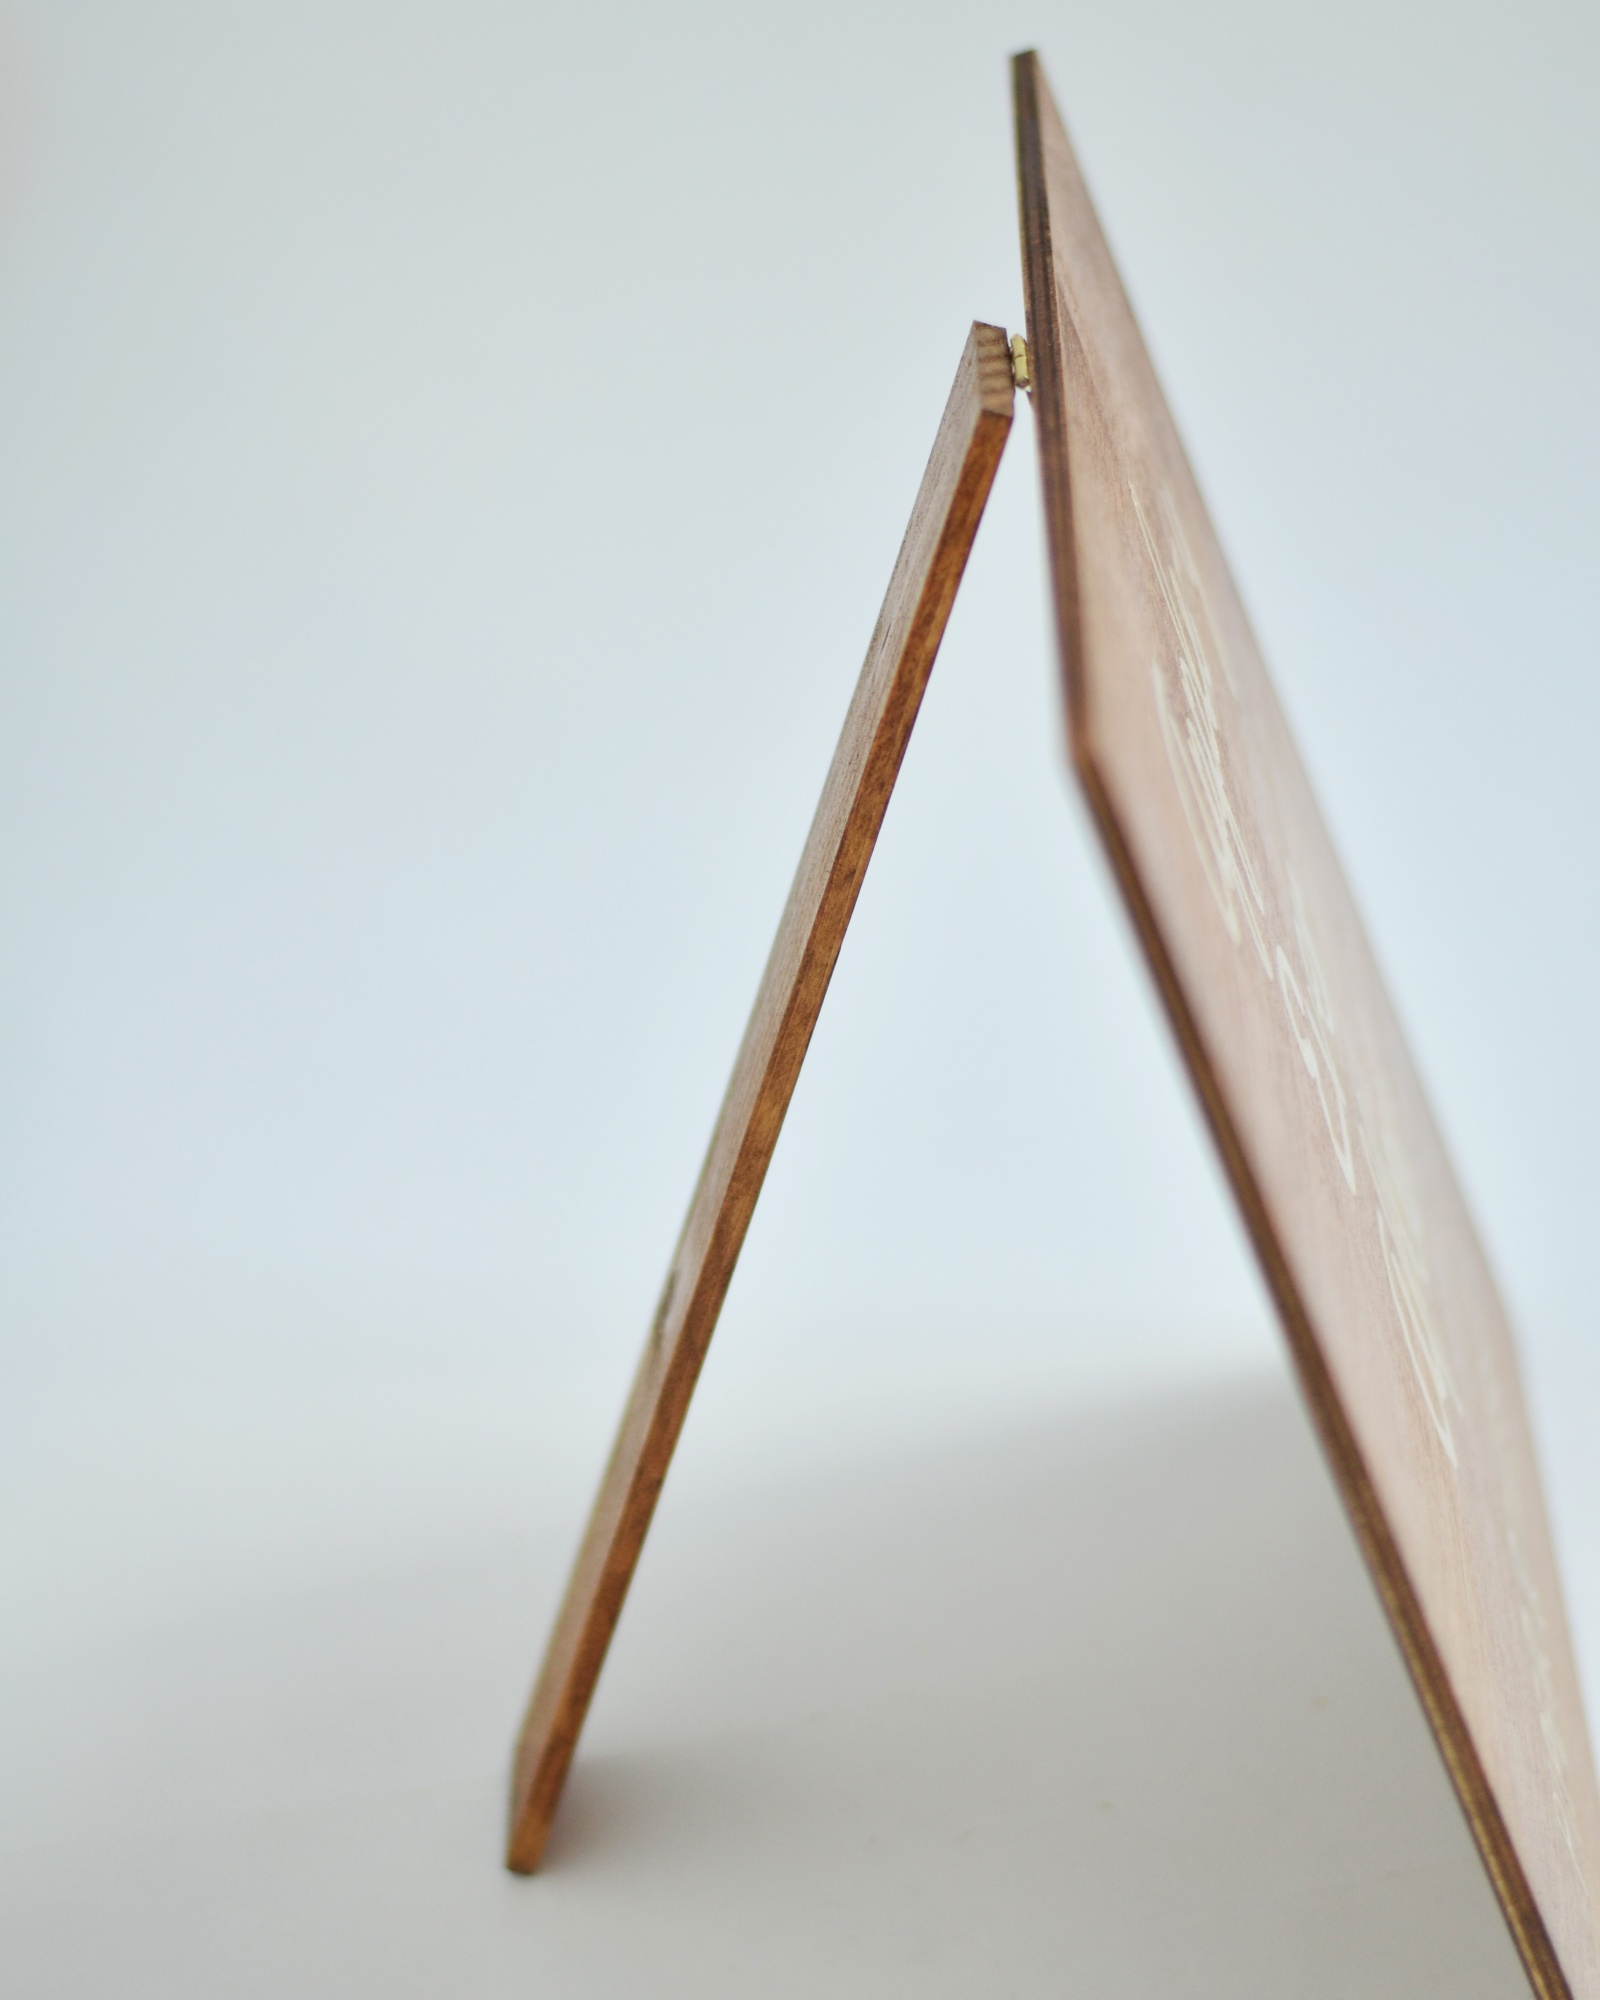
Now style and enjoy at your wedding or fall event!

What do you think of this project? Are you planning on DIY’ing decorations for your wedding?
Shop This Post