

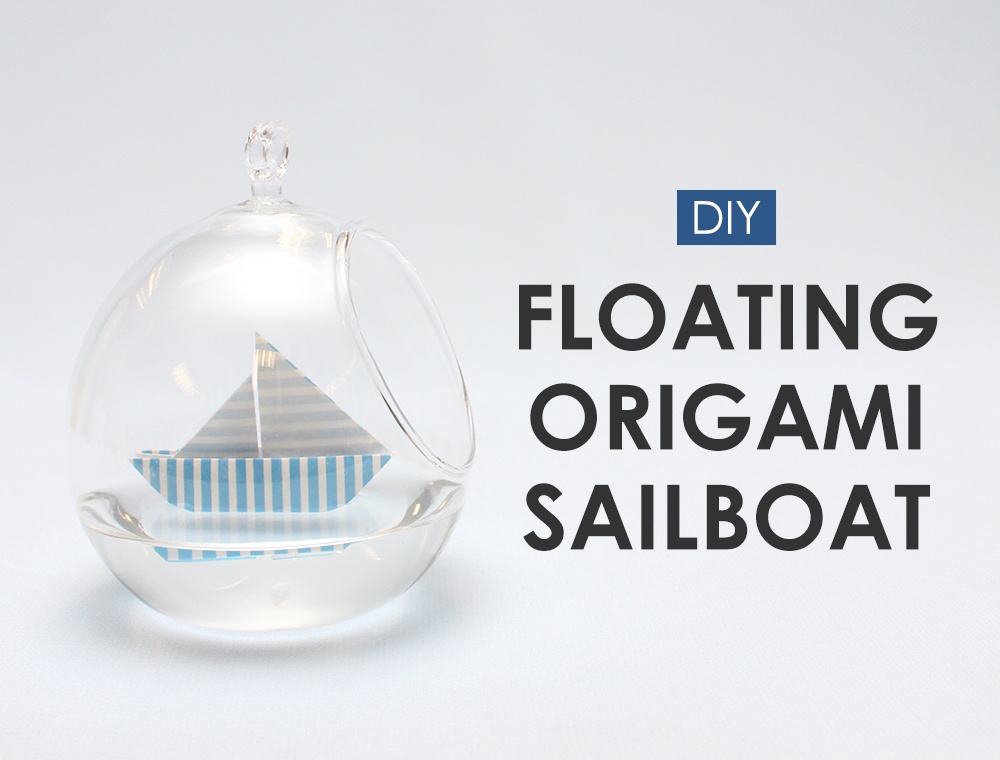
One of our favorite summer party themes is Nautical. The bold stripes, rope accents, and anchor motif are a classic combination that never looks dated. This year, we’re loving the idea of a nautical baby shower, and in looking for easy DIY decoration ideas, came across this cute origami sailboat floating inside a hanging glass globe, and just had to try it.

Ahoy DIY-ers, this was not as easy as it sounded. Folding the sailboat is a piece of cake, but getting it to float was a bit of a challenge. For starters, the bottom of the boat had to be water resistant, or else it would soak up the water, and the boat would be destroyed. We tried a few different methods, and are happy to report that there is a solution! Read on for details, and get the step-by-step tutorial.
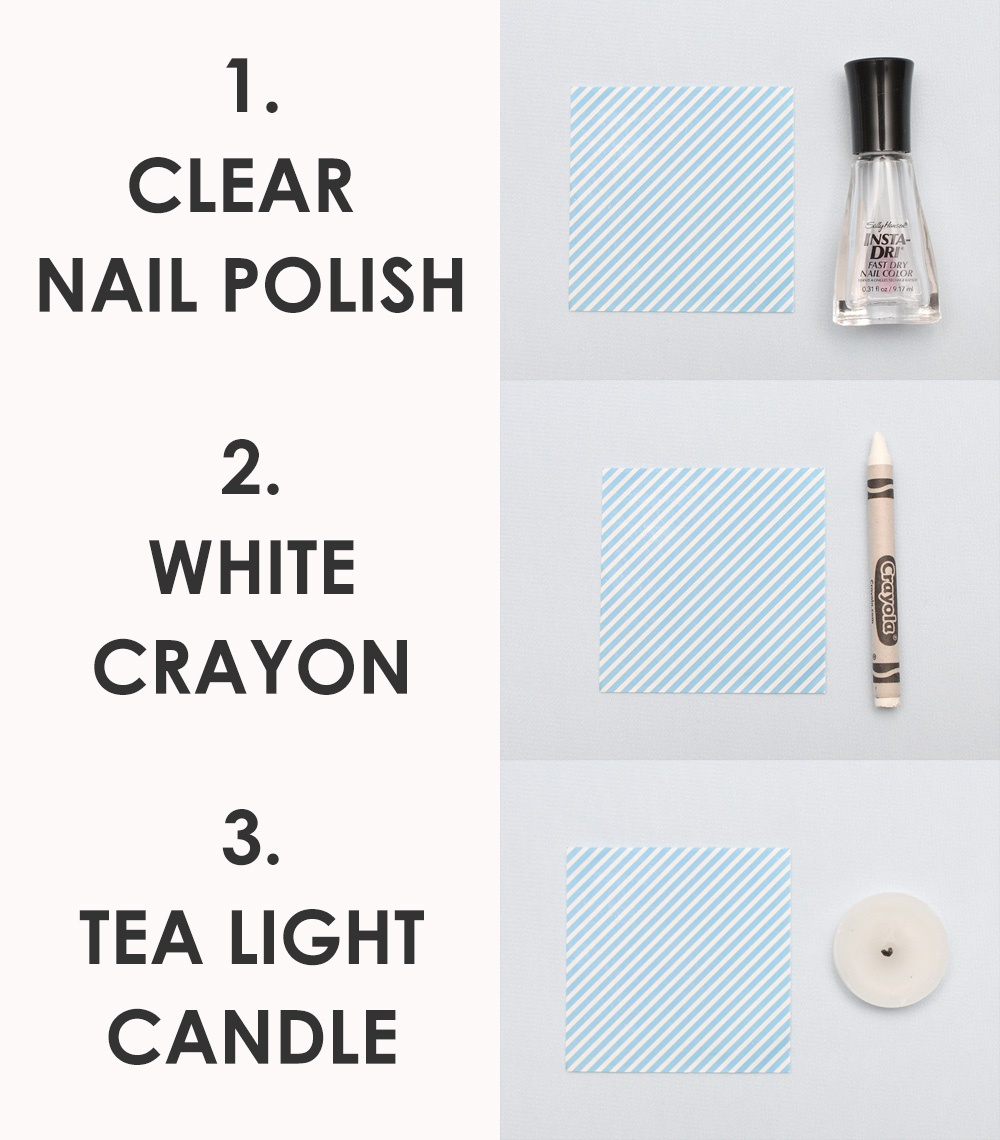
Our first idea was to attach a piece of wax paper to our origami paper and fold them in tandem with the wax paper forming the bottom of the boat. This proved too difficult to fold. So then we thought about coating the paper…but with what? First we tried clear nail polish, but to our dismay, this made the paper too heavy, and our boat did not float (*sad face*). So then we tried covering the patterned side of the paper with white crayon, and were encouraged to find that you couldn’t see the crayon at all! But when we dropped our boat in the water, it was off-balance and couldn’t stand up straight. Perhaps the wax just didn’t apply evenly? So finally, we tried rubbing our paper with a tea light candle, and pushed our little boat out to sea. Lo and behold, it worked!
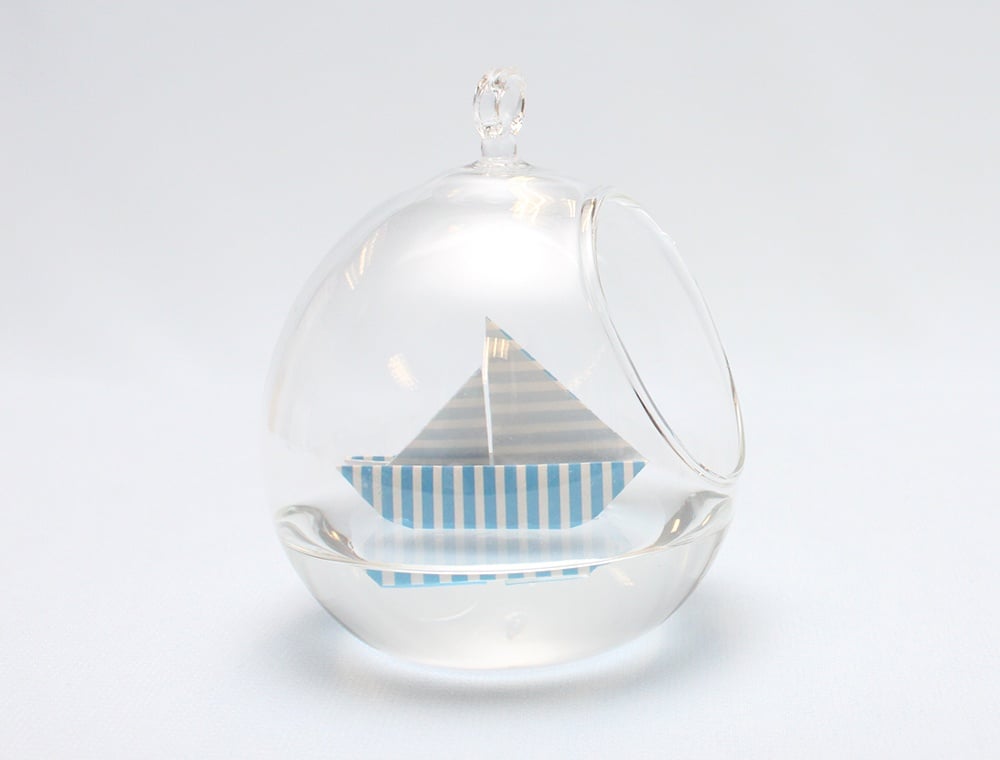
Not only did our boat sail straight, it held up against the water for hours. So there you have it! The secret to a seaworthy paper boat, is a little candle wax.
Here’s a diagram for folding the boat:
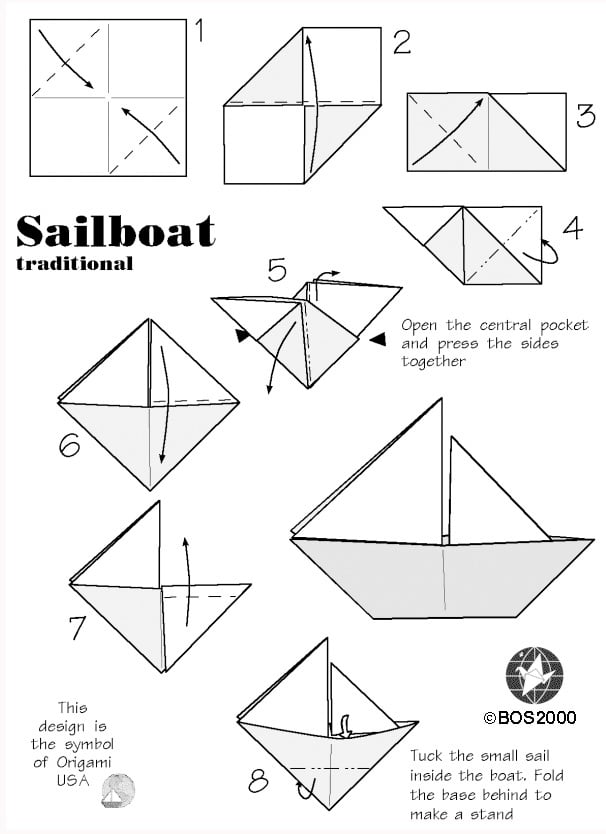
Origami Sailboat instructions, by the British Origami Society